Category Archives

16 Articles

Posted by Runa Troy on

Crescent Cakes for Imbolc

They may not necessarily look like the moon, but they sure do taste good.

Coming down off a ritual requires something special. There’s a reason that besides the social aspect of the post-circle or post-ritual “cakes & ale” there is a need to fill back up. Magic is work. These traditional crescent cakes are so delicious, you really won’t care what they look like. Enjoy with some tea or a cup of coffee and your body, mind, and magic will all be restored.

I make these each February in celebration that Spring is on its way. They are a traditional Imbolc treat in our home. This recipe helps to make an Imbolc celebration rich.

If you can’t source ground almonds, it’s easy enough to make them in your food processor.

Ingredients:

11/2 cups flour
1/2 cup sugar
1 cup finely ground almonds
1/2 teaspoon vanilla extract (alternatively 3 drops of almond extract)
1/2 cup butter or margarine, softened
1 tablespoon honey
1 egg yolk

Make sure your butter is softened, because otherwise you’ll be mising forever.

Instructions:

Unless you can source almonds already ground, you’ll need to use a food processor. Then in a large mixing bowl, combine the ground almonds with the flour, sugar, and vanilla extract. Add the butter, honey, egg yolk and mix together well. Cover with aluminum foil or plastic wrap, and then chill for 11/2 to 2 hours in the refrigerator. When ready, pinch off pieces of the dough (about the size of plums) and shape them into crescents. Place the crescents on a parchment-lined or, alternatively, a well-greased cookie sheet and bake in a 350-degree preheated oven for approximately 20 minutes.

Don’t forget to save one for the good neighbors.

This recipe should make about a dozen cakes.

Posted by Runa Troy on

KimChi

A Witch’s Brew That’s Good For Your Gut

KimChi brewing in Runa’s kitchen at Villa Westwyk

Equipment:

  • Cutting board and knife
  • Large bowl
  • Gloves (optional but highly recommended)
  • Mason Fermenting Kit, or a plate and something to weigh the kimchi down, like another mason jar filled with water
  • Colander
  • Clean 1-quart jar with canning lid or plastic lid
  • Bowl or plate to place under jar during fermentation

Ingredients:

  • 1 medium head napa cabbage (about 2 pounds)
  • 1/4 cup iodine-free sea salt or kosher salt
  • Water, preferably distilled or filtered (this is important!)
  • 1 tablespoon grated garlic (5 to 6 cloves)
  • 1 teaspoon grated peeled fresh ginger
  • 1 teaspoon granulated sugar
  • 2 tablepoons fish sauce or salted shrimp paste, or 3 tablespoons water
  • 1 to 5 tablespoons Korean gochugaru sauce or red pepper flakes (note: the more you add, the spicier it is)
  • 8 ounces Korean radish or daikon radish, peeled and cut into matchsticks
  • 4 medium scallions, trimmed and cut into 1-inch pieces

Instructions:

  1. Cut the cabbage. Cut the cabbage lengthwise through the stem into quarters. Cut the cores from each piece. Cut each quarter crosswise into 2-inch-wide strips. You will likely need more cabbage than you think, so get the biggest head of Napa Cabbage you can find.
  2. Salt the cabbage. Place the cabbage in a large mixing bowl (non metal — plastic or glass is best) and sprinkle with the salt. Using your hands, (you don’t need the gloves yet here) massage the salt into the cabbage until it starts to soften a bit. Add enough water to cover the cabbage. Put a plate on top of the cabbage and weigh it down with something heavy, like a jar or can of beans. Let stand for 1 to 2 hours.
  3. Rinse and drain the cabbage. Rinse the cabbage under cold water 3 times. You know us witches love the number three. Seriously, get as much of the salt out as you can. If you have one of those lovely salad spinners, those work well here, but aren’t necessary. Set aside to drain in a colander for 15 to 20 minutes. Meanwhile, make the spice paste.
  4. Make the spice paste. Rinse and dry the bowl you used for salting. Add the garlic, ginger, sugar, and fish sauce, shrimp paste, or water and stir into a smooth paste. Stir in the gochugaru sauce, using 1 tablespoon for mild and up to 5 tablespoons for spicy (I like about 3.3 tablespoons – there’s that magic number again); set aside until the cabbage is ready.
  5. Combine the vegetables and spice paste. This is where you’ll want those gloves. Gently squeeze any remaining water from the cabbage and add it to the spice paste. Add the radish and scallions. Mix thoroughly. Using your hands, gently work the paste into the vegetables until they are thoroughly coated. 
  6. Pack the kimchi into the jar. Put the kimchi into a 1-quart jar. Press down on the kimchi until the brine (the liquid that comes out) rises to cover the vegetables, leaving at least 1 inch of space at the top. Runa uses a muller to get this done, but you can use a smaller jar filled with water of the back of a large spoon. Seal the jar.
  7. Let it ferment for 1 to 5 days. Place a bowl or plate under the jar to help catch any overflow. Let the jar stand at cool room temperature, out of direct sunlight, for 1 to 5 days. You may see bubbles inside the jar and brine may seep out of the lid. Runa ferments her for the full 5 days because The Viking and she love those probiotics to be very active!
  8. Check it daily and refrigerate when ready. Check the kimchi once a day, opening the jar and pressing down on the vegetables with a clean muller or spoon to keep them submerged under the brine. (This also releases gases produced during fermentation.) Taste a little at this point, too! When the kimchi tastes ripe enough for your liking, transfer the jar to the refrigerator. You may eat it right away, but it’s best after another week or two.

We keep a jar in the fridge all the time; it works as a nice side dish at lunch to get some veggies in and keep that gut healthy.

Posted by Runa Troy on

Roasted Pumpkin Seeds

Whether you grow your own pumpkins or pick one up at the local farm stand or grocery store, you get two bits of goodness out of it, not only the pulp as in our featured Roasted Pumpkin Soup, but also the seeds.

If you have enough seeds saved for your garden next year, then roast those babies up and have yourself a yummy and healthy treat.

Pumpkin seeds have a good amount of fiber in them, are a great low-carb treat, and pack a protein punch. They also are a good source of Omega-6s and Vitamin K. Careful of how much salt you put on them and you’ve got yourself a guilt-free munchie!

Equipment:

Baking sheet pan

Parchment paper or cooking spray

Oven

Mixing Bowl

Ingredients:

Fresh pumpkin seeds (**)

Oil of choice

Salt

Spices of choice(***)

Instructions:

Heat oven to 300 degrees F. Line your baking sheet pan with parchment paper, otherwise you may want to do a light coating of cooking spray. Put the seeds in a bowl, Add about 1 tablespoon of oil and 1 tsp of salt per 1 cup of seeds. Mix thoroughly. Put the oiled and salted seeds in a single layer on the prepared roasting tray. Make sure they aren’t too crowded. The more space between them the better. Feel free to roast your seeds in batches if you have carved up a larger pumpkin. Roast for about 20 minutes. Keep an eye on them, because they can go from perfect to perfectly burnt quickly. When a light golden brown (a bit darker if you’ve put spice on them), remove from oven. Cool for about 5 to 10 minutes on the pan and then enjoy. Keep in an airtight container for up to 4 days; however, they never last that long in Runa’s house.

(**) You can wash your seeds until they are clean like the above photo, just be sure they aren’t soaking wet when you go to roast them, ensure they are as dry as possible or they won’t roast properly. Otherwise, you can just get the big chunks of pumpkin off and roast them as is. Runa likes to do the later and the bit of pumpkin that remains on the seeds, cooks off in the oven and adds an extra bit of flavor to them.

(***) Runa makes hers with paprika and black pepper; but you can experiment — you could even do a little nutmeg and cinnamon to echo a pumpkin pie. Your call. But salt is a best partner regardless.)

Posted by Runa Troy on

Roasted Pumpkin Soup

Runa makes this for the Night of Hecate, but it’s easy to make any time during pumpkin season. Runa grows her own pumpkins, but you can procure any kind of pie pumpkin for this recipe.

Fresh foraged mushrooms are a thing this time of year, too. If Runa has chanterelles or Oyster mushrooms on hand she uses those. But some nice cremini mushrooms work, too.

Runa also brews up her own stock to use in this recipe. But you can use store bought, or simply water.

If you’re lucky enough to have a larder with homemade apple sauce, use that in this as well — but only if it’s an unsweetened variety. Otherwise use a fresh apple.

Runa loves to serve this with a swirl of sour cream accompanied by hunks of farmer’s cheese and sourdough biscuits. But you do you, witch.

The roasted goodness is so nutritious and yummy that you’ll want to make it all through the year! Don’t forget to either save the seeds for planting next year or roast them up as a great autumn treat!

Equipment:

Roasting Sheet Pan

Cauldron

Immersion blender, or heavy-duty blender, or food processor

Ingredients:

1 pie pumpkin (about 4 lbs.), de-seeded and quartered

13 fresh foraged mushrooms of choice or cremini mushrooms (you can use any mushroom of your choice)

6 whole, peeled garlic cloves (up to 13 can be used if you like things more garlicky)

7 mini sweet peppers, topped and de-seeded (leave as whole as possible)

1 large sweet onion, peeled

1 half-pint of unsweetened apple sauce or one large fresh apple, peeled, cored and cut into chunks

3-4 cups of stock of your choice (Runa used vegetable broth) or water

1 tsp. nutmeg

1 tsp. salt (with more to taste)

1 tsp. pepper

1 tsp. paprika (optional)

Sour cream (optional)

Grated Cheese of choice (optional)

Instructions:

Preheat Oven to 400 degrees F. Line a baking sheet with parchment paper or spray with cooking spray. Put pumpkin quarters, garlic, peppers, onions, and mushrooms on pan and roast for 40 minutes. Let cool until you can touch the pumpkin without burning your hand (about an hour).

Peel the pumpkin and put the roasted pulp into a greased cauldron (cooking spray or a splash of your favorite oil is fine), put all the rest of the roasted veggies in with the pumpkin, add the cut up apple, and about 1 cup of your stock (or water). Immersion blend. (If you don’t have an immersion blender, put all the veggies in a food processor or blender and puree). Add the spices and the rest of the broth and simmer on stove until slightly thickened. Serve with a dollop of cream or shredded cheese and a good hunk of bread.

Posted by Runa Troy on

Cauldron Cooking: Pucker-Up Rhubarb-Strawberry Pie

Cauldron Cooking:  Pucker-Up Rhubarb-Strawberry Pie

Maker:S,Date:2017-3-13,Ver:6,Lens:Kan03,Act:Lar02,E-Y

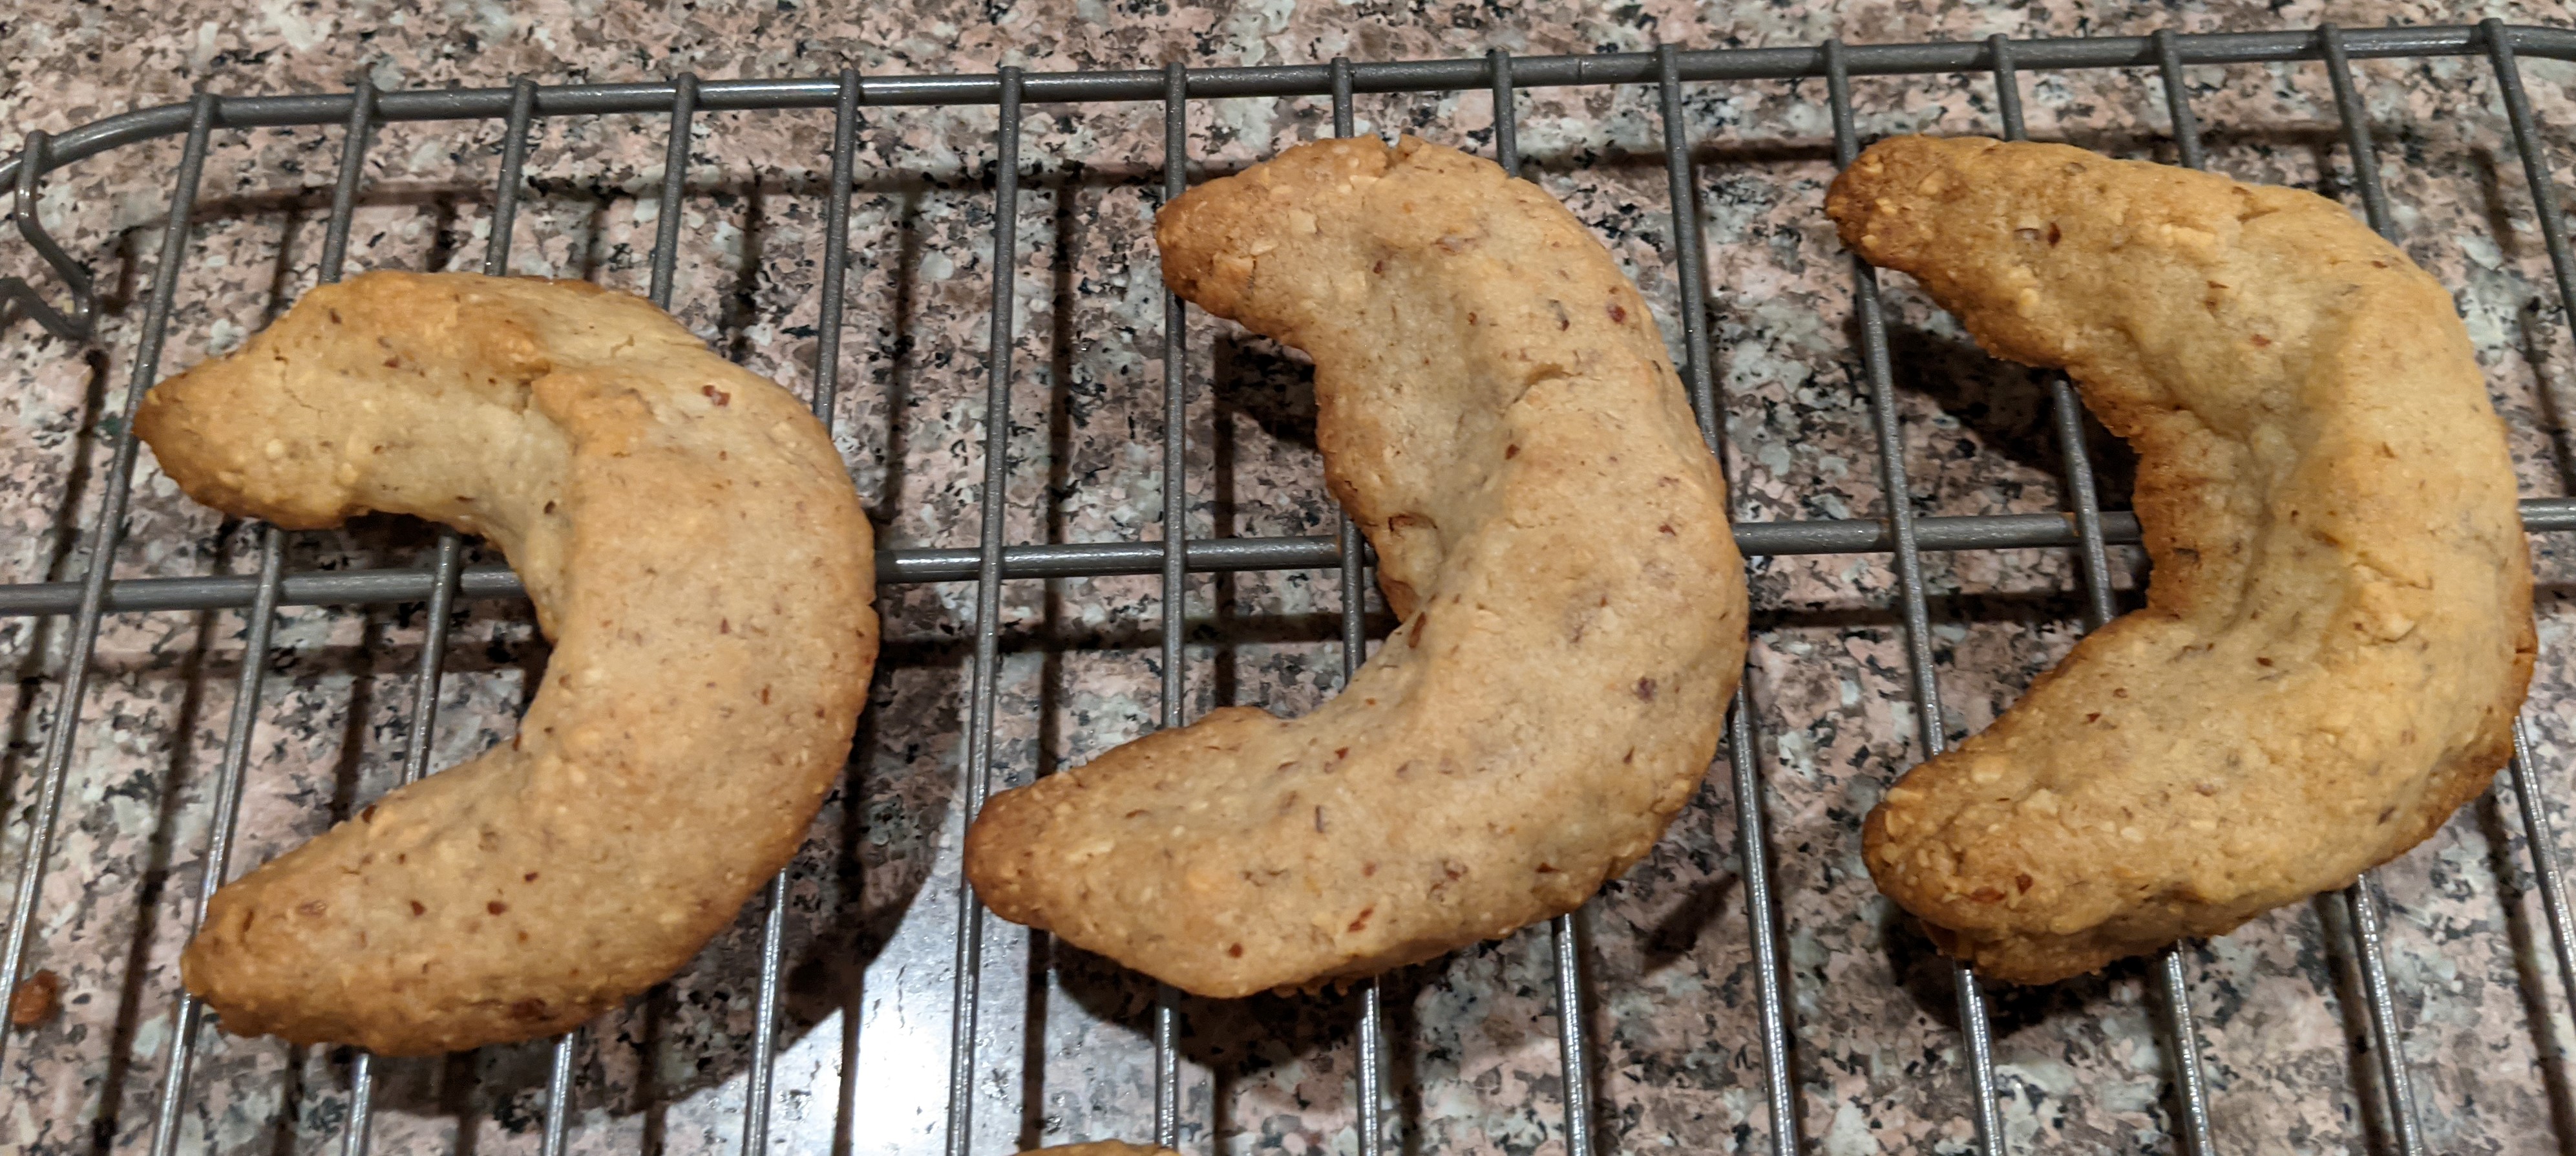
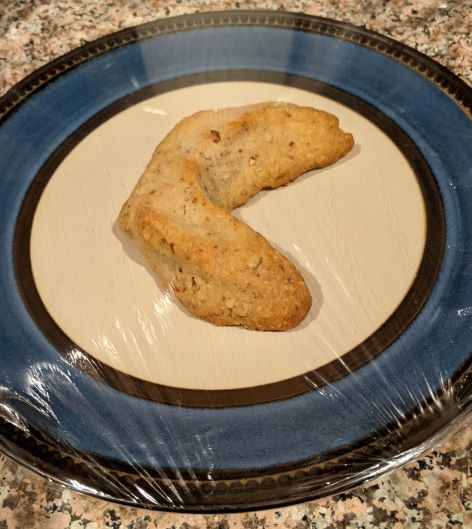
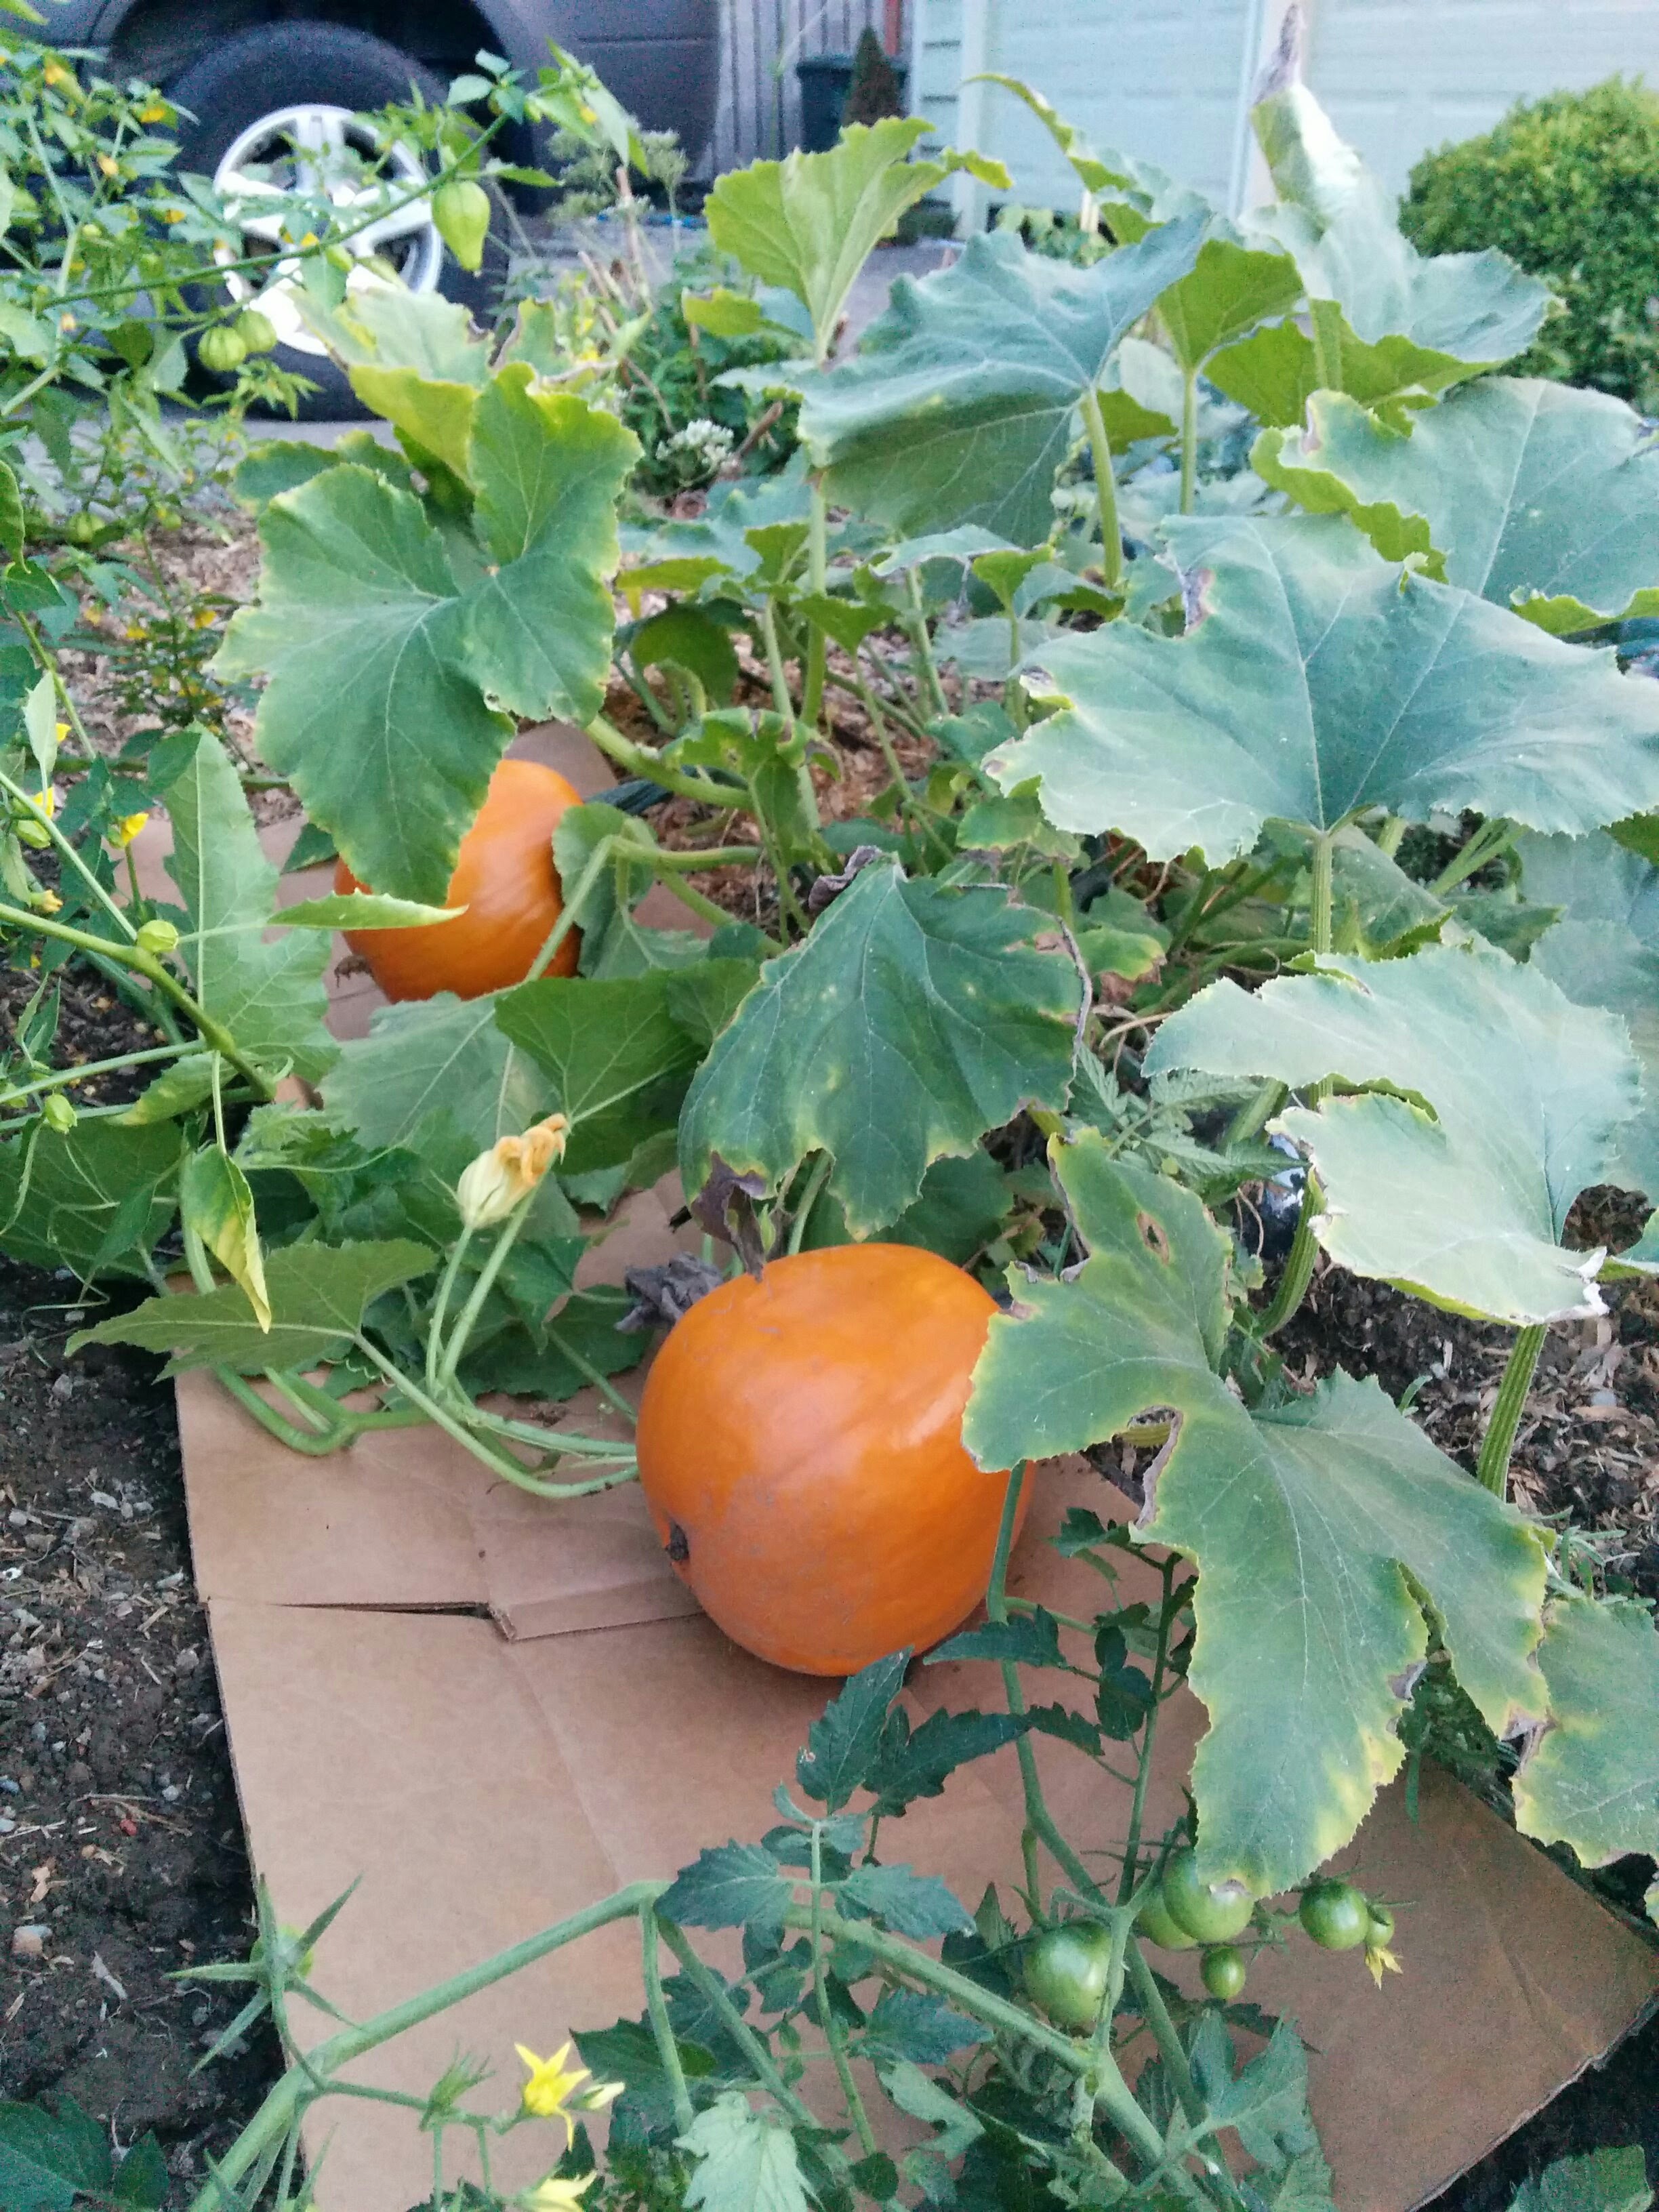
Not prize-winning, but magick making all the same.

Sweet and sour kisses may be in your future after you bake this; regardless, you’ll amp up your joy to all who see, smell, and taste this beauty of a spring-time dessert recipe. This is a matriarchal recipe, so good chance your divine feminine will increase in power while preparing and eating this. The magick in this recipe is all about amping up the sweetness in your life.

Whether it’s just getting a good parking spot in the market; or stealing more kisses with your sweetie. As you roll our the dough, it’s good exercise for your hands to do positive things like give a massage to your spouse, or give a helping hand to an elderly neighbor — ramp up that sweetness in your life. If you’re having trouble obtaining any extra sweetness in your life, bake this pie with the intention to do just that and watch the good times roll. If you attempt a weave crust, this recipe ends up giving you more courage, too.

Notes:

This recipe calls for 5 to 6 cups of chopped rhubarb; however, that is mutable.  I tend to stay closer to about 4 1/2 cups because I like a less tart pie.

I use coconut sugar instead of refined sugar. A good substitute would be brown sugar or organic cane sugar. But, if all you have on hand is refined sugar. that’s fine. Although I like a less tart pie, I coconut sugar goes a long way and I don’t like the sugar ingredient to overpower the natural sweetness of the strawberries. However, you can use up to 1 1/2 cups of sugar, whichever variety you use.

Almond meal is used as a binder in this recipe. Traditionally pies like this are made with corn starch. My body doesn’t like corn starch, so hence the almond meal. However, if you have an almond allergy or aren’t a fan of almond meal, you may use corn starch.

Normally this recipe is made with orange zest and juice; however, I have always had a sensitivity to oranges and since I’m using more natural sweeteners these days, and if I’m baking and don’t have juice on hand, the maple syrup (the real stuff, not the fake Log Cabin stuff) complements all the flavors together.

The secret ingredient. hehe.

MY SECRET INGREDIENT:  (Which is obviously not secret any more).  Unlike Mom’s recipe I add a generous shot of Mischief Whiskey, but your favorite bourbon or rum would be good, too. There’s so many flavored vodkas out there, you could use that; too. I’m allergic to vodka, so whiskey it is.

Cinnamon to taste is exactly what it means — your preference. I throw in a level tablespoon. Your mileage may vary.

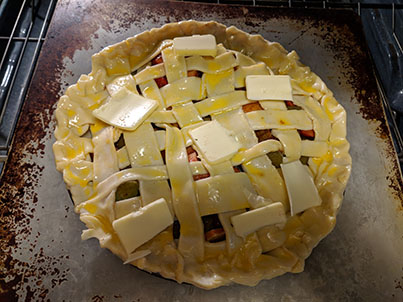
When you add the filling to the refrigerated pie crust, leave out as much of the juice that rendered while the filling rested. Filling is going to bubble and splash while it bakes, hence that is why you need a baking tray. I always use a metal pan to make my pies anymore. In the past I’ve used glass and it doesn’t bake as well. If you’re in a pinch, you could totally bake your pie in a cast-iron frying pan. Talk about upping your witchiness in the kitchen!

Need to bake something up in a hurry? Feel free to use store-bought pie crust dough.

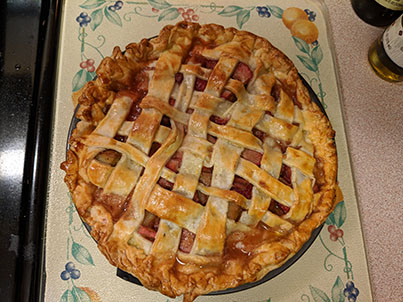
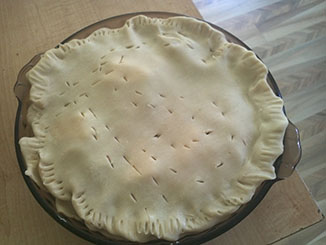
Now Mom’s recipe calls for making a weave top crust, which I don’t always do (see variety of photos); I just put a full piece of crust on top like you would for any fruit pie — apple, cherry, peach, etc. — but the good thing about the lattice pattern is that it allows steam and some of the juice of the pie to evaporate. I’m including the directions for the checkerboard-crust pattern. As you can see by my photo, my lattice work needs improvement. But it’s about goodness and not perfection, as well as having fun. So cut yourself some slack.

Do not skip refrigerating the bottom crust.

Ingredients:

1 1/2 pounds of rhubarb, cut into 3/4-inch-long pieces (about 5 to 6 cups)

2 to 2 1/2 cups sliced strawberries

3/4 to 1 1/2 cup cup coconut sugar

1/4 cup almond meal

1/4 cup of maple syrup or 1 teaspoon finely grated orange zest, plus 1 tablespoon orange juice

Cinnamon, to taste

Coarse salt

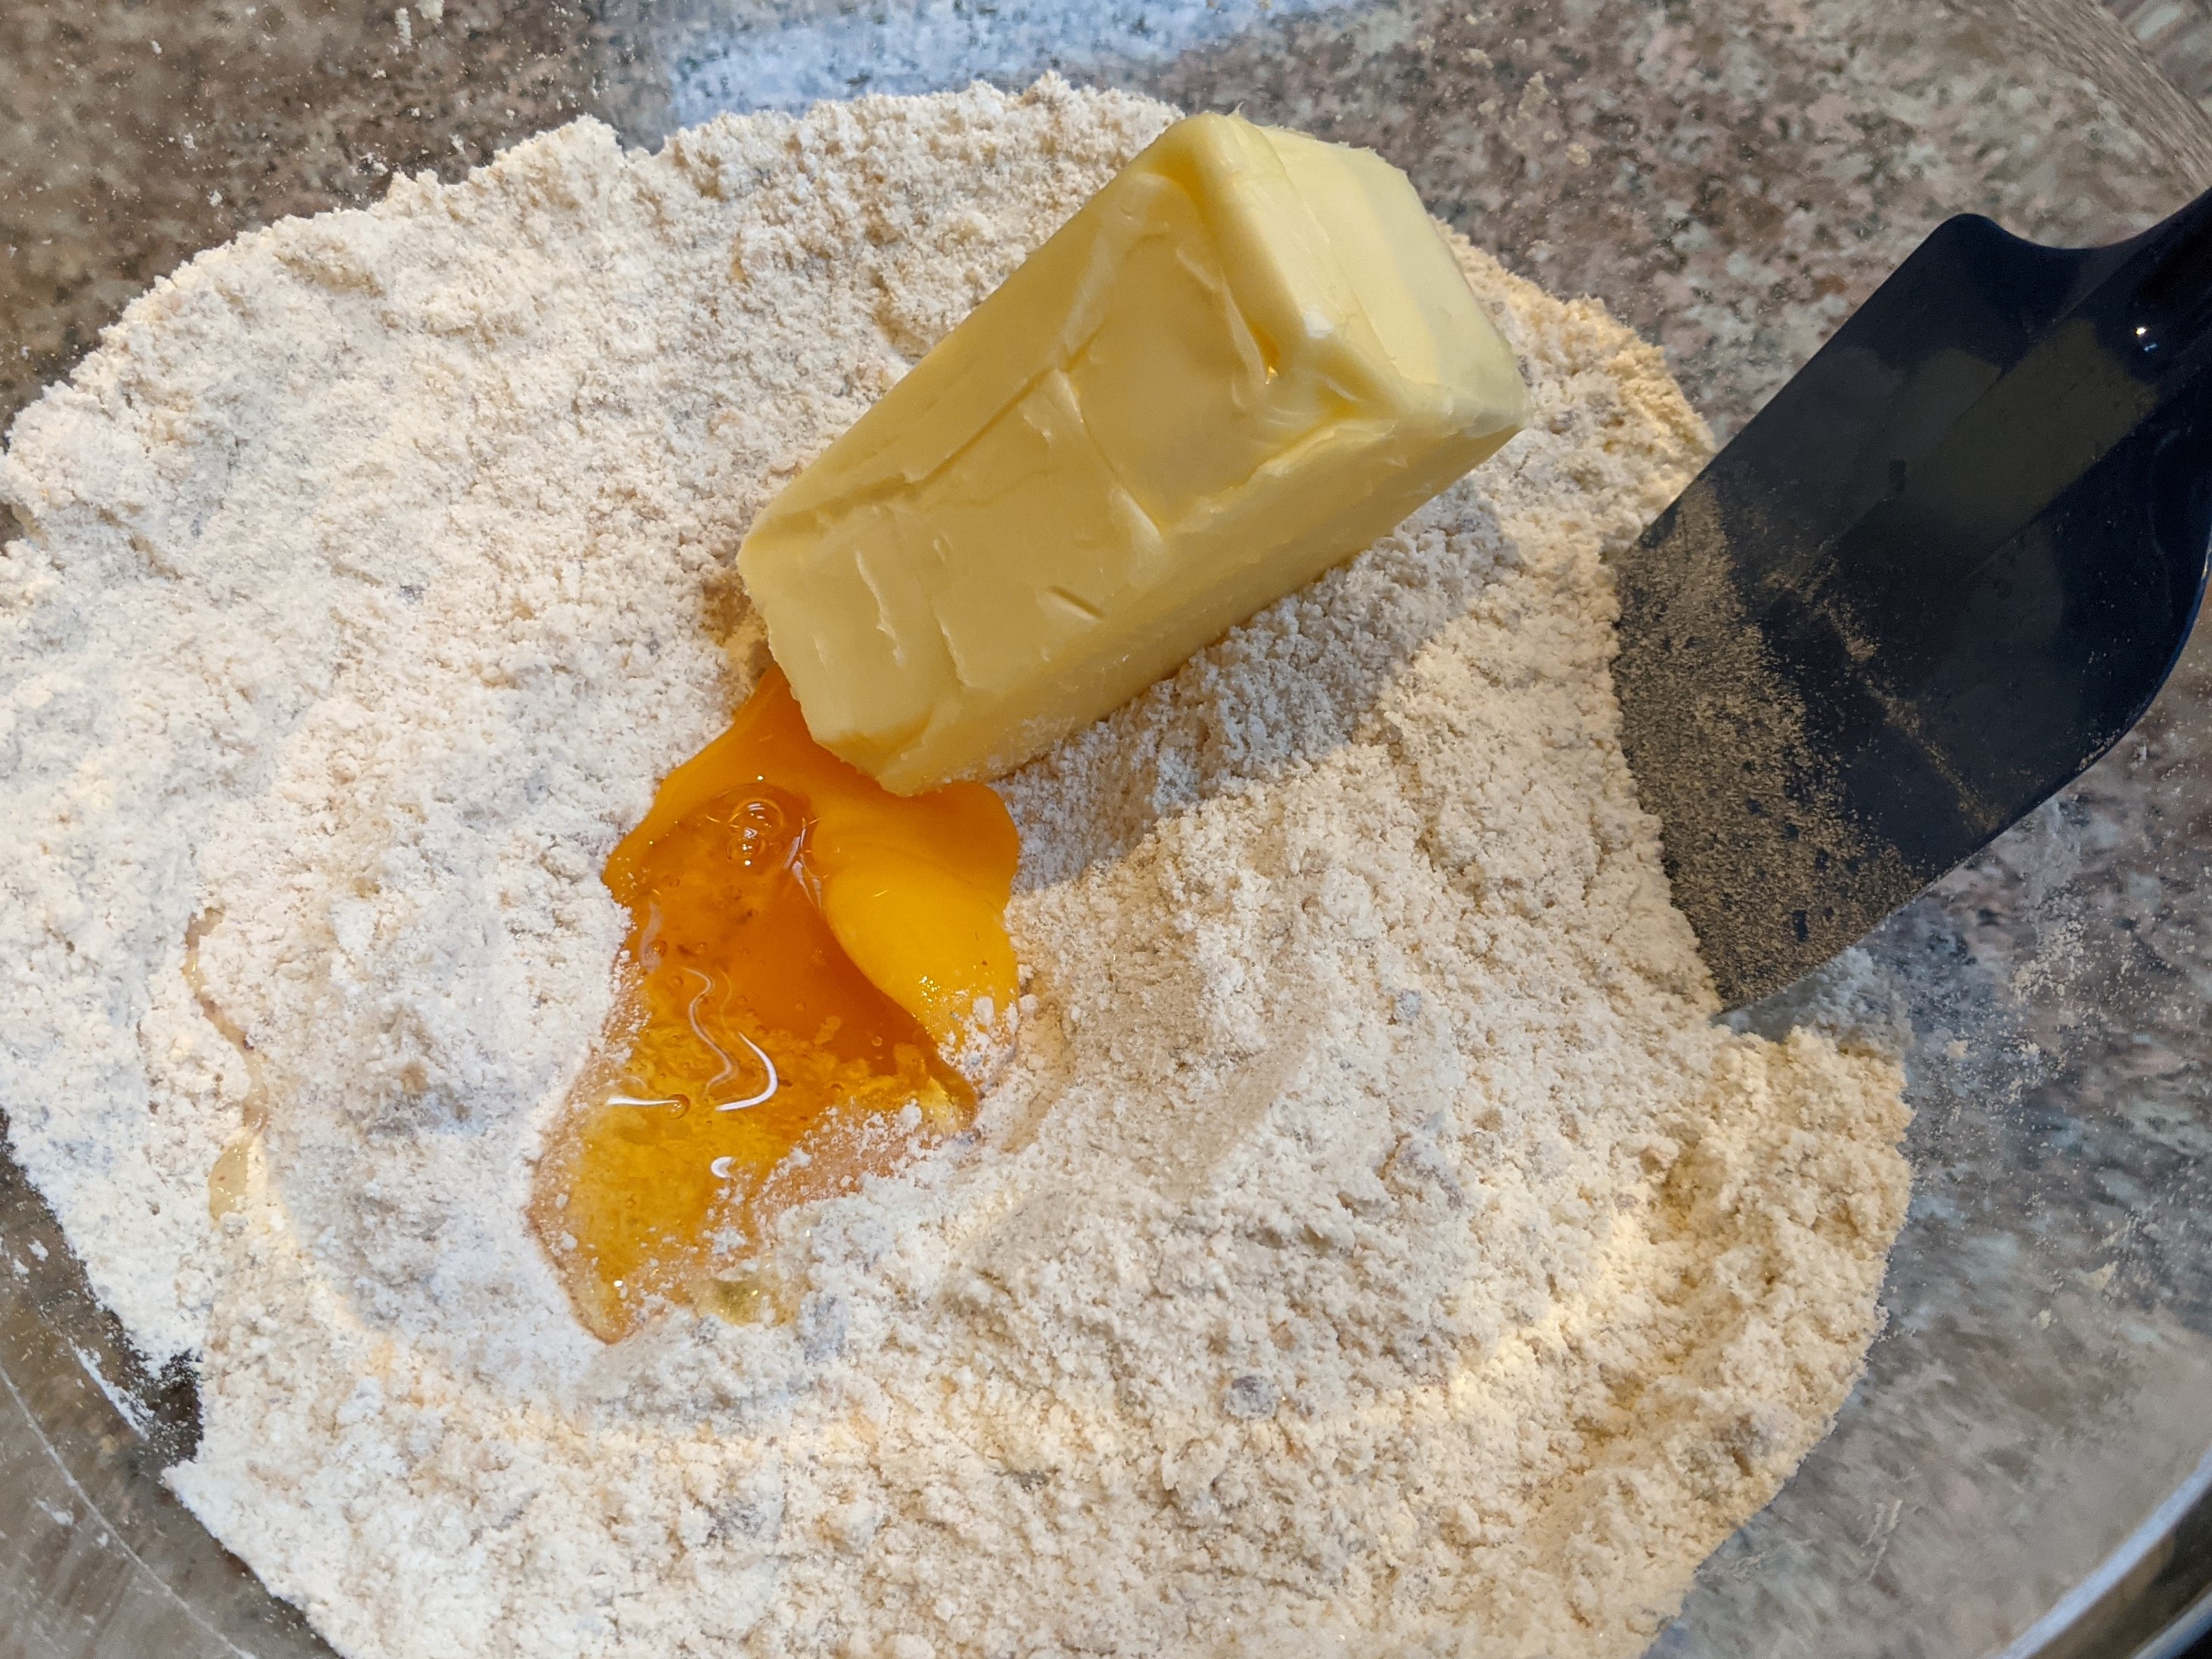
2 tablespoons unsalted butter, cut into pieces

1 large egg, lightly beaten, for egg wash, optional

Sugar for sprinkling, optional

A healthy shot of your favorite sweet spirit

Your favorite two-disk pie crust recipe ready to rock.

Doesn’t matter if you use a full crust or do a weave. You decide. Doing a weave amps up your courage, however, so go ahead and try that little kitchen witchery.

Instructions:

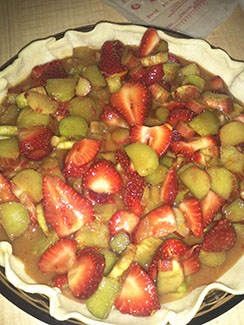
To make filling:  Mix together rhubarb, strawberries, sugar, almond meal, maple syrup, 1/4 teaspoon of salt, and cinnamon to taste. Set aside and let rest.

Yummy, yummy sweetness.

Roll out one dough disk so it’s 1/8-inch thick and will fit into a nine-inch pie plate. Place the dough in the pan, pour in the filling (leave out as much of the juice that rendered while the filling rested); dot top with butter.  Refrigerate while making top crust.

Roll remaining disk to 1/8-inch thickness on a lightly floured surface. Cut into at least 10-inch-wide strips using a fluted pastry cutter.

Lay five strips across pie. Fold back every other strip, and lay a horizontal strip across the center of the pie. Unfold folded strips, then fold back remaining strips. Lay another horizontal strip across the pie. Repeat folding and unfolding strips to weave a lattice pattern. Repeat on remaining side.

Trim bottom and top crusts to a 1-inch overhang using kitchen shears and press together to seal edges – be sure it’s a tight seal. Fold edges under, and crimp as desired. Refrigerate for 15 minutes (this is very important step).

Preheat oven to 400 degrees.

Remove the pie from the refrigerator. Brush crust with egg wash, if desired, and sprinkle generously with sugar (I didn’t do this step). Place a foil-lined baking sheet on the bottom rack to catch juices, (I highly recommend this! Even if you have a self-cleaning oven) and bake pie on middle rack for 30 minutes. After 30 minutes, reduce the temperature to 375 degrees and continue baking until filling is vigorously bubbling in center and bottom crust is golden , about one hour. Tent loosely with foil after one hour if crust is browning too quickly. Transfer pie to a wire rack, and let cool for at least two hours before serving.

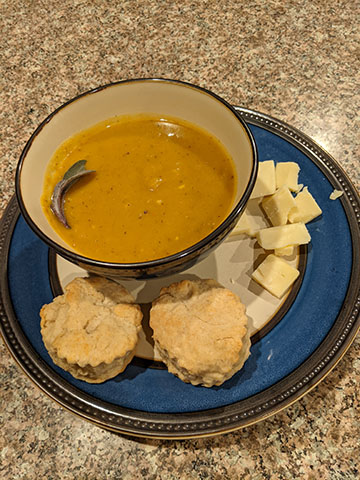
Ready for some sweetness? Eat it up and enjoy!

Leave comments on your attempt to make this or any questions you might have.

BB,

~Runa


Posted by Runa Troy on

Cauldron Cooking: Guilt-Free, Good-For-Your-Gut Banana Bread

Slice up some yum and eat yourself well in the process.

This crone is here to tell you that as you get older, what you put in your body becomes even more critical. So why not add a little health magick along with being more intentional about what ingredients you use to create meals and food for yourself, your friends, and most importantly your family.

Notes:

This recipe is adapted from Sugar Loves Spices. I have learned so much from their blog. Go give them some love. The original recipe called for toasted walnuts. I didn’t bother. It tasted great. But if you like that extra roasted flavor, go for it.

The use of olive oil and honey makes this also a healthier choice not just calorie-wise, but also for your glycemic index and gut health.

I used cashew milk in my recipe. It’s got some good nutrients that this ol’ crone needs.

You’ll need some parchment paper for this. I don’t have a cast iron loaf pan yet. I will get one before turning to sea life. But if you have one, especially if it’s well-seasoned, I would recommend it. Otherwise, parchment paper necessary.

You’ll need a baking sifter, too.

Ingredients:

  • 1 1/2 cups organic whole spelt flour
  • 1 teaspoon baking soda
  • 1/2 teaspoon fine sea salt
  • 1/3 cup extra virgin olive oil
  • 1/2 cup raw, organic honey
  • 2 organic free range eggs
  • 1 cup mashed bananas (about 2 medium bananas)
  • 1/4 cup milk
  • 1 teaspoon pure vanilla extract
  • 3/4 cup walnuts, chopped, divided into 1/2 cup and 1/4 cup

Instructions:

  1. Preheat your oven to 350° F and line a bread pan, with baking paper hanging over the edges so you can lift it out easily.
  2. Chop the walnuts. Set aside.
  3. Sift the spelt flour, baking soda and salt into a large mixing bowl and stir to combine.
  4. Beat the olive oil and honey together in a separate bowl. Add the eggs and beat well. Mash the bananas into the mixture, then add in the milk and vanilla and stir to combine.
  5. Fold the wet ingredients into the dry ingredients until just combined.
  6. Add 1/2 cup of the chopped and toasted walnuts and combine. The other 1/4 cup is for sprinkling on top.
  7. Pour the mixture into the prepared loaf tin and smooth the surface with the moistened back of a spoon or spatula. Top with the rest of the walnuts. Let rest five minutes before putting in oven.
  8. Bake in the preheated oven for about 50 minutes, or until a toothpick inserted in the center comes out clean.
  9. Allow to cool in the tin for 5 minutes before lifting out and cooling on a wire rack for a further 30 minutes before slicing.

Let cool before slicing.

Make your life full of love & magick,

~Runa

Posted by Runa Troy on

Cauldron Cooking: Mad Mama Chicken Marsala

The magic of this dish is that it’s simple to make and often impresses; however, even deeper is that you will find your anger, anxiety, and worries slipping away as you pound the chicken into nice thin cutlets to turn into Chicken Marsala.

If you’re struggling with anger or a bit of anxiety, this dish is sure to cure what ails you. The magic is about releasing the negative and taking in the good.  It’s a great meal to pull out to impress,

Get all your ingredients together first. You don’t want to get frustrated or anxious while you cooking. You want to work through that during this process.

but isn’t hard to pull off at all.

Notes:

This meal is made even healthier by serving over zoodles or smashed cauliflower. You’ll notice I cooked up the extra zucchini right

Pounding and dredging the chicken allows you to see your negativity slipping away.

along with the mushrooms; but you don’t have to do that either. I just don’t like things going to waste. But if you’re not concerned, regular pasta or mashed white potatoes is fine.

You’ll need a big plate to set the chicken and mushrooms aside, or maybe even a large corning dish. Just make sure you have one large enough to hold all this deliciousness while you prep the sauce.

This is a one-cauldron recipe. I use my cast-iron dutch oven. It’s perfect.

The recipe calls for shallots, and they certainly are my go-to for this recipe. But you can use whatever onions you prefer or have on hand.

Make sure you have a plate to set the chicken aside on.

Ingredients:

4 chicken cutlets pounded until 1/2 – 1⁄4″ thick

Salt and pepper to taste

1/3 cup + 1 Tbsp. all-purpose flour

Mushrooms help detox you inside and out.

5 Tbsp olive oil

3 tbsp unsalted butter

8 oz white button mushrooms sliced

8 oz cremini mushrooms sliced

2 Tbsp shallots minced

2 cloves garlic minced

2/3 cup dry Marsala wine

2/3 cup beef stock

My favorite cauldron. A lid helps make this recipe cook right, too.

Fresh thyme, chopped

Fresh parsley, chopped

Grated Parmesan for garnish

Zoodles or smashed cauliflower, to serve the Marsala over/with

Instructions:

Add 2 Tbsp olive oil and 1 Tbsp butter and heat over MED-HIGH heat in your cauldron. Imagine your worries, strife, anxiety, or anger melting away.

Almost ready. As this dish simmers to almost done, you can feel your simmering anger melting away.

Sprinkle pounded chicken cutlets with salt and pepper on both sides, then lightly dredge in the 1/3 cup flour. Shake off excess flour and add chicken to hot pan. Work in batches if needed, as over-crowding the pan will prevent the chicken from crisping up.

Cook chicken about two to three minutes per side, until golden, transfer the cooked chicken to a plate and set aside.

Add 2 Tbsp olive oil and 1 Tbsp butter to the pan and add mushrooms. Saute about 5-8 minutes, seasoning with salt and pepper about half-way through cooking. As the mushrooms cook, imagine all kinds of solutions and helpers to your worries, problems, and strife — or balms for your anger or anxiety. Remove mushrooms to plate with the chicken and set aside.
Sprinkle in the 1 Tbsp flour and stir to coat. Cook for a minute to get the flour taste out.
Pour in Marsala wine and beef stock, scraping the bottom of the pan with a wooden spoon.
Cook, stirring often, for 2 minutes, or until sauce is slightly thickened.
Slide chicken and mushrooms back into the pan, making sure to get all the juices from the plate into the pan – that’s pure flavor there!
Add 1 Tbsp butter to the center of the pan, toss a sprig of thyme in there if desired, then cover the pan and let cook about 2 minutes.
Stir and spoon sauce over chicken.
Garnish with fresh thyme, parsley, and Parmesan — if desired, and serve.

I wish you could smell this goodness. Fresh herbs boost your positive energy.

Posted by Runa Troy on

Cauldron Cooking: Pot Luck Ham Bean Soup

Potluck Ham-Bean Soup: Healthy Togetherness in one bowl.

Spring colds are the worst. But this recipe is great to help you get back on the mend. It’s also great for hand-fasting potlucks. Make this and freeze half if you’re not feeding a crowd. Then you have a ready-made meal on a night you don’t feel like cooking. The magic in this one is not only turning water into good-for-you broth; but, also the kick of healthiness everyone who eats it will feel. There’s nothing better than bringing people together over a big cauldron of soup and watching it warm their cheeks and hearts.

Everything you’ll need to make a happy pot of ham-bean soup.

Notes:

I rarely let things like ham bones go into the compost without first making soup of it. It also cuts down on the amount of leftovers we have after having a ham dinner like at the Vernal equinox. However, making soup right after a holiday isn’t always possible. So I cut my leftovers away from the ham — any that we’ll actually eat given activity schedules, and then always leave about a pound of ham on the bone and put it in a gallon-sized freezer bag and put it in the deep freeze. Then it’s ready when I’m ready. It’s the same with a turkey or chicken or duck carcass, leg of lamb, or seafood shells. Bone broth is magic, so I never let it go to waste.

Never let ingredients to make your own broth go to waste.

It’s best if you start this about mid morning to have it ready for early afternoon dinner. Even if it sits and simmers a bit before dinner, that’s great, too. If I’m feeling even more energetic, I’ll bake a loaf of bread to go with this while the soup cooks.

You’ll need your large 6 quart cast-iron dutch oven for this. You know, your cauldron. And it must have a lid. You’ll need it for this recipe.

The star of this show is really the veggies; but, if you have more than a pound of ham after you stew your bone into broth, that’s fine, too.

Simmer the first round of veggies for 15 minutes.

This recipe is considered low-carb. Enjoy it.

Ingredients:

Ham bone with about another 1 lb. of meat cut up into bite-sized chunks

4 cups water that will be turned into broth

1 Onion, chopped (1 cup), large

2 Carrots, sliced (1 cup), medium

1 stalk Celery

2 cloves Garlic

1 can Muir glen tomatoes, organic, diced

1 tsp Oregano, dried leaves

2 tsp Basil, dried leaves

1/4 tsp Pepper

1/2 tsp Salt

1/2 cup Parmesan cheese

4 cups Spinach, packed fresh leaves

2 cans (15 to 15.5 oz each) great northern or cannellini (white kidney) beans, drained, rinsed

A lid for your dutch oven/cauldron is necessary for this recipe.

1 can of above said beans, but different — this bean will be “smashed” to make the soup thicker

2 tbsp Olive oil (optional)

1 Bay Leaf (optional)

Parsley for garnish (optional)

Instructions:

As you can see, we’re pushing the limit of over 1 pound of ham. But that’s okay. Use what you have.

Take the ham bone and 4 cups of water and put in seasoned cast-iron dutch oven and bring to a boil. After it comes to a boil, cover, reduce heat to low and let simmer for a couple of hours. Yes, I said a couple of hours.

The water will turn broth, then remove the ham bone and all the meat, and reserve on a plate. Be sure to get all the meat out of the liquid, especially any that fell off the bone. You want to be able to cut it up into bite-sized chunks.

Put the chopped onions, celery, carrots, and garlic into the broth and cook on med-low for at least 15 minutes with the lid on.

While that cooks, take the one can of beans that has been selected to smash, and drain the liquid and smash the beans in a bowl with a potato masher or fork. Add the two tablespoons of olive oil to help it smash easier. But this is optional)

Add the tomatoes, oregano, basil, salt and pepper. You are welcome to add the bay leaf and parsley in at this time if you like. Cook with lid on for another 15 minutes.

Now this is a happy cauldron.

While this cooks, be sure to scrape your bone of all ham and cut into bite-sized pieces.

Then add Parmesan, spinach, and the two cans of whole beans and the 1 can of smashed beans. Cook with lid on for another 15 minutes.

Stir the pot and taste to see if you need more pepper or salt. At this point you can either serve, or let it simmer for at least another 30 minutes. Be sure to keep the lid on until serving and keep heat on low.

Posted by Runa Troy on

Cauldron Cooking: Mediterranean Halibut

Cauldron Cooking:  Mediterranean Halibut

Mediterranean Halibut with a side of roasted asparagus. So good and so good for you.

Mediterranean Halibut with a side of roasted asparagus. So good and so good for you.

There’s nothing better than eating a meal you can feel super good about. This is one of those. The magic in this meal is about amping up the love in your life, whether that’s strengthening the love of your family and friends, or romantic love with you and your lover. As you make it, envision how leveling up the love quotient in your life looks like. Each time you add an ingredient to this recipe,

Everything you need to level up the love in your life and feed your heart and belly.

as you prepare it, see that image again. See the people eating it feel the love you have for them, as well.

Notes: 

I can’t stress enough how easy it is to make your own broth. Try it. Or find your local kitchen witch who can cook some up for you. Be sure that the halibut is wild-caught, fresh. If you can get directly at your local fisherman’s wharf, even better. If you’re landlocked, sleuth your way to the vendor that has the freshest fillets.

If halibut is out of your price range, any white, meaty fish could be replaced, such as sole or Mahi Mahi. I’ve made this recipe even with

If you don’t have an indoor griddle, you could make this on the barbecue; but I like hte temperature control of my griddle better.

catfish. Experiment if you like.

This is an easy recipe that doesn’t take too long to make either, so if you want to amp up the love on a week night, go for it.

I serve this meal with a side of roasted asparagus. It’s a perfect pairing.

You’ll need a cast-iron frying pan and a cast-iron griddle pan for this recipe.

Sauteeing the vegetables in steps is the key to success in this recipe.

Ingredients:

1 tablespoon olive oil, plus 3 tablespoons

4 (6-ounce) halibut fillets

1/4 teaspoon salt, plus more for seasoning fish

1/4 teaspoon freshly ground black pepper, plus more for seasoning fish

2 shallots, sliced into thin rounds

2 cloves garlic, minced

1 pound frozen artichokes, thawed; or, jarred artichoke hearts, rinsed

Step Two.

1/2 cup white wine

1 1/2 cups low-sodium chicken broth

1 (14.5-ounce) can diced tomatoes

1/2 teaspoon minced fresh thyme leaves

Step Three

Fresh lemon slices (optional for garnish)

Instructions:

Drizzle 1 tablespoon of olive oil over the halibut and season with salt and pepper. Heat a grill pan over high heat. Cook the fish on the grill pan until just cooked through, about 4 minutes per side, depending on thickness.

In a medium saucepan, heat the 3 tablespoons of olive oil over medium-high heat. Add the shallots and cook for 1 minute. Add the garlic and artichokes and cook until golden brown, about 5 minutes. Add the white

Look at that halibut goodness

wine and stir, scraping the brown bits off the bottom of the pan with a wooden spoon. Add the chicken broth, tomatoes and juice, thyme, and 1/4 teaspoon each salt and pepper (or more to your taste). Bring to a simmer.

Ladle the artichoke and tomato broth into shallow bowls. Top with the grilled

A close up of love in a bowl.

halibut. Serve immediately with fresh lemon slices, if desired.

Leave comments on your attempt to make this or any questions you might have.

BB,

~Runa

Roast asparagus in your oven to complement this dish. Totally optional, but again, super loving.

Posted by Runa Troy on

Cauldron Cooking: Poor Man’s Gyros

Gyro Salad Topping ingredients

Hummus ingredients.

This is the best garlic sauce to use on your Poor Man’s Gyro. Here in Western Washington, the local QFC’s carry it. So good.

Let me apologize straight away that there’s no image of the final product. Everyone ate so fast, I wasn’t quick enough to get the “plated” photo. Forgive me. Just know this is a well-loved recipe and my go-to for a pick-me-up meal in the middle of the week, when we all need a little boost.

Your cauldron for this meal is a cast-iron skillet.

The magic in this recipe is about balance and grounding. This is a meal in itself and is very balanced, especially if you include the hummus and the cucumber and tomato salad inside of the flatbread sandwich. Imagine each of the ingredient’s vibrations grounding you and those who partake of this meal to balance your emotional, physical, and spiritual being.


Notes:

You’ll need at least a cast iron frying pan for this one. If you have a food processor, that makes the hummus making easier; but, you can smash away with whatever you have available. I make hummus no less than once a week, so I’ve invested in a food processor.

You’re going to need a good-sized lemon, juiced. No need to zest it. One tablespoon of the juice is going to be saved for the gyro meat; the rest for the hummus. Lamb and lemon juice were made to go together. Regardless, one of your first prep steps is to juice that lemon.

Make the hummus first. The day before if you can manage it, especially if no one will eat it all before the gyros are made. That doesn’t always happen here. So if you need to make it right away, no worries. If you’re doing by hand, get comfortable. It may take an extra minute or twenty.

No need to make fancy meat patties like many homemade gyros recipes call for. Remember, this is “Poor Man’s Gyro.” You can be poor on time or energy…what have you. But after you eat these, you’ll know that the patty method doesn’t change the deliciousness.

For your flatbread or pita, you can warm the bread by putting it between two damp – not dripping wet – and microwave for 30 to 45 seconds. You may also heat in a low oven (190 degrees F) wrapped in foil, while you prepare the meal.

Ingredients:

For the gyro filling:

2 pounds of ground lamb

No need to make a fancy meat patty, just cook up the ground lamb like you would a sloppy joe or taco meat or meat sauce.

1 onion, diced (you want enough to cover the bottom of your skillet

1 Tablespoon of lemon juice (reserved from juiced lemon in hummus ingredients)

2 garlic cloves, minced, more if desired

For the salad topping:

1 English cucumber, cut into bite-sized quarters

1 pint of cherry or grape tomatoes, cut in half

4 oz. of feta cheese, or more if desired

1 shallot thinly sliced

Parsley (fresh or dried), to taste

Greek dressing, to taste

All the hummus ingredients ready in the food processor before whipping into yumminess.

For the hummus:

1 can of chick peas/garbanzo beans, liquid drained

1 Lemon, juiced, with reserved 1 Tablespoon for gyro filling

Olive oil, about 1/3 cup in total

Tahini (2 tablespoons)

1 Tablespoon, Minced garlic

1/2 Tablespoon, Dried mint (optional)

Harissa seasoning, to taste (1 rounded teaspoon is a good starting point) (optional)

For making the sandwich:

Your favorite flatbread or pita

Garlic or Tzatziki sauce, to taste (see photo above)

Instructions:

Hummus is great not only for making Poor Man’s Gyros, but also as a snack with raw veggies.

Hummus: Drain the beans, add 1/4 cup of the olive oil, and then put all the ingredients into a food processor and work until smooth.  After it’s smooth and creamy, scrape into a bowl that you can cover, add a sprinkle of olive oil, Harrissa seasoning, and some parsley. Refrigerate until ready to use with gyros.

Salad Topping:  Slice the shallots and put into a bowl. Cut the cherry/grape tomatoes into bite size pieces — at least in half and put in bowl on top of shallots Cut cucumber into quarter slices. Put on top of tomatoes in bowl. Put feta cheese crumbles on top of cucumbers. Sprinkle with a light coating of Greek dressing. Toss. Set aside.

Gyro Filling:  Heat cast-iron skilled on medium until hot. Saute garlic for one minute. Put chopped onion in and cook 1 minute. Add lemon juice and ground meat, and then cook until pink is gone. I have found that if I let it cook down on low after the pink is gone, most of the grease of the meat is gone. You can drain grease if you like. But lamb is way leaner than beef, so be careful not to burn your filling.

Put it all together:  Take your choice of flatbread or pita and spread a thin layer of hummus on it. Take the gyro meat – use a slotted spoon if necessary – and spread a thin layer over bread. Top with garlic tahini sauce. Then spread gyro salad topping on top of that. Serve immediately.

Enjoy the balance of yumminess and healing to all parts that are you and your dining guest!

Food is Everyday Magic,

~Runa